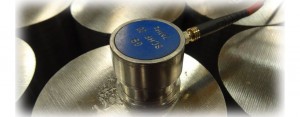
The Ultrasonic inspection process utilises the use of a pulse echo type flaw detector which operates at 1-5 Mhz. This is used to detect and evaluate sub surface indications in welds and wrought products.
Sound is transmitted through the material under examination using a series of ultrasonic probes each containing a piezo electric crystal; pulses of electricity are passed through the crystal which in turn creates mechanical vibrations (sound waves). The sound waves are then passed through the material to be inspected, using a coupling medium (couplant).
The probes used for scanning are generally 0⁰ normal probes and 45⁰, 60⁰, 70⁰ angle probes. The variety of probes used are designed to ensure scanning covers the full cross sectional area of a component during examination, in the case of welded joints the correct probe selection is important as a high percentage of weld defects are found on the fusion faces. The fusion faces/bevels of welded connections vary dependant on; welding process, material thickness and joint geometry.
Prior to scanning the flaw detector is calibrated and the test sensitivity is set. This is vital to ensure any flaws in the component are accurately assessed during examination. During the test any responses which show on the flaw detector will be evaluated against the relevant contract specification, and acceptance criteria for length, depth, amplitude, characterization and positon within the component.
Ultrasonic standards mainly used are;
ISO 17640- Non-destructive testing of welds – Ultrasonic testing –Techniques, testing levels, and assessment.
ISO 11666- Non-destructive testing of welds – Ultrasonic testing –Acceptance levels.
ISO23279- Non-destructive testing of welds – Ultrasonic testing -Characterization of Indications in welds.
